 Save
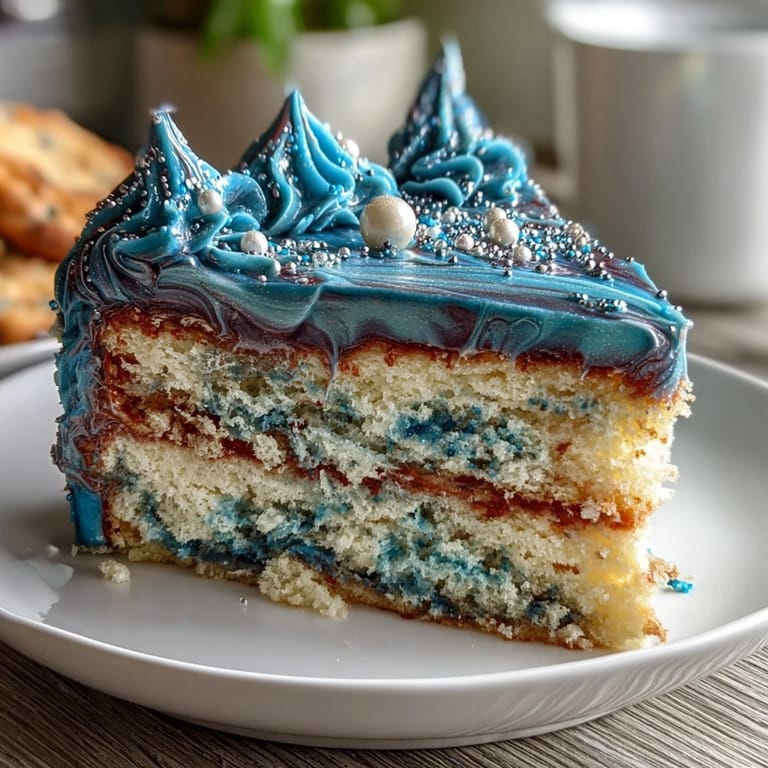
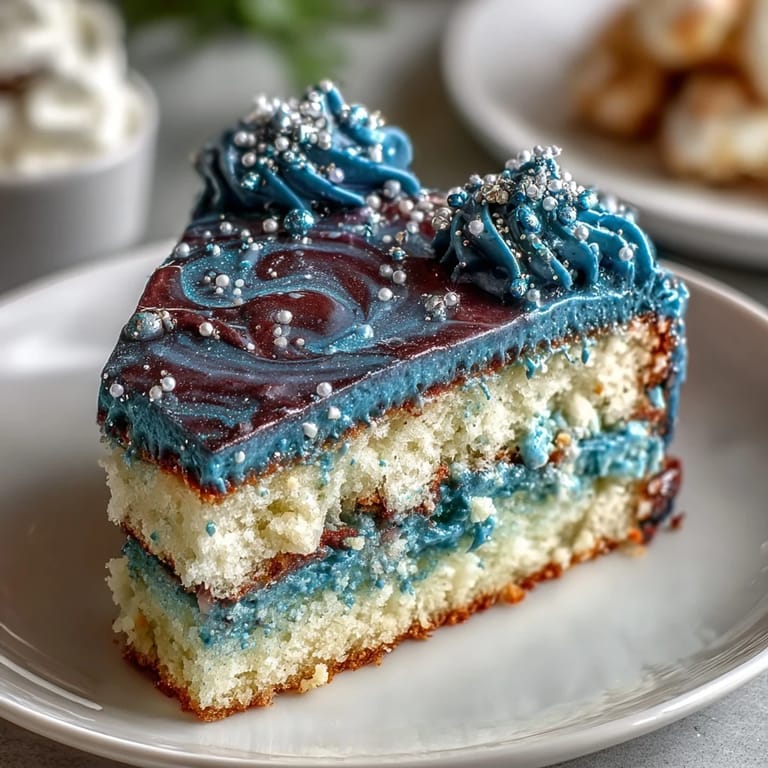
Save My friend texted me a photo of her Pisces birthday coming up, and instead of the usual bakery cake, she asked if I'd make something cosmic. Standing in my kitchen at midnight, scrolling through zodiac imagery, I got this wild idea to bake a galaxy cake in her honor. The vision was so clear: swirls of deep blue and purple, stars scattered across layers, something that looked like it belonged in a planetarium. When I finally pulled that first cake from the oven, the house smelled like vanilla and possibility, and I knew this was the cake that would make her feel seen.
Last summer, I made this cake for my sister's surprise party, and watching her face when she saw all those shimmering colors come into focus was absolutely worth every minute of prep work. She's always been the dreamy Pisces type, so the celestial theme felt perfect for her. The best part? Everyone at the party took photos before eating a single slice, and that kind of moment is what makes baking feel like actual magic.
Ingredients
- All-purpose flour (2 ½ cups): Room-temperature ingredients matter more than you'd think, so make sure your butter and eggs have been sitting out for at least an hour before you start, and use cake flour if you want an even more tender crumb.
- Baking powder (2 ½ tsp): Double-check the expiration date because old leavening agents are why cakes sometimes don't rise the way you expect them to.
- Unsalted butter (1 cup for cake, 1 ½ cups for frosting): Salted butter will throw off your flavor balance, so don't try to swap it in even if it's what you have on hand.
- Granulated sugar (2 cups): This is what gives the cake its tender structure and that beautiful golden-brown color on top.
- Large eggs (4): They need to be room temperature or your batter will look broken and your cake won't rise evenly.
- Pure vanilla extract (1 tbsp for cake, 2 tsp for frosting): Buy the real stuff because imitation extract can taste a little off, especially when vanilla is your main flavor.
- Whole milk (1 cup for cake, ¼ cup for frosting): The milk keeps the cake moist and helps the frosting get that perfect whipped texture.
- Powdered sugar (5 cups, sifted): Sifting removes lumps that would otherwise create little grainy spots in your frosting, so don't skip this step even though it feels tedious.
- Gel food coloring (navy, purple, teal, black): Gel colors are more concentrated than liquid ones, so you'll need less to get those rich galaxy tones without watering down your buttercream.
- Edible glitter (silver, blue, or iridescent): This is where the magic happens, and honestly, the shimmer is worth every penny.
Tired of Takeout? 🥡
Get 10 meals you can make faster than delivery arrives. Seriously.
One email. No spam. Unsubscribe anytime.
Instructions
- Set up your workspace:
- Preheat your oven to 350°F and grease three 8-inch round pans with butter or cooking spray, then line the bottoms with parchment paper so the cakes slip out cleanly. Having everything ready before you start mixing means you won't panic halfway through batter prep.
- Mix your dry ingredients:
- Whisk together the flour, baking powder, and salt in a medium bowl, breaking up any lumps as you go. This step distributes the leavening evenly so your cake rises consistently.
- Cream butter and sugar:
- Beat the room-temperature butter and sugar together for 3 to 4 minutes until it looks pale and fluffy, like clouds. This incorporates air into the batter, which helps your cake rise and gives it a tender crumb.
- Add eggs and vanilla:
- Drop in one egg at a time, beating well after each addition, then mix in the vanilla extract. Adding eggs slowly prevents the batter from looking curdled and greasy.
- Alternate wet and dry ingredients:
- Add the flour mixture and milk in three additions, starting and ending with flour, stirring just until combined. Overmixing develops gluten, which makes cakes tough, so stop as soon as you don't see streaks of flour.
- Divide and bake:
- Distribute batter evenly among the three pans and bake for 25 to 30 minutes until a toothpick inserted in the center comes out clean or with just a few moist crumbs. The tops should spring back when you touch them gently.
- Cool the cakes:
- Let the cakes sit in their pans for 10 minutes to set, then turn them out onto wire racks to cool completely. Cooling completely prevents the frosting from melting and sliding off.
- Make the galaxy buttercream:
- Beat the soft butter until creamy, then gradually add the sifted powdered sugar, milk, and vanilla, beating until smooth and fluffy. This usually takes about 5 minutes with an electric mixer.
- Color your buttercream:
- Divide the frosting into four bowls and add gel coloring to create navy blue, purple, teal, and black shades, adjusting intensity until the colors feel celestial. A little gel goes a long way, so add it drop by drop to avoid going too dark.
- Assemble and swirl:
- Place the first cake layer on your serving plate, then spoon alternating colors of buttercream across the top, letting colors touch and blend slightly. Use an offset spatula to swirl gently in a circular motion, creating that galaxy effect without overworking the frosting.
- Frost the sides:
- Apply the remaining frosting to the sides of the cake using the same color rotation, swirling as you go around. Step back occasionally to see how the colors are blending and adjust your swirls if needed.
- Add the sparkle:
- Sprinkle edible glitter generously across the top and sides while the frosting is still soft enough to hold it. The glitter will catch light and create that stunning cosmic shimmer.
- Optional fondant details:
- If you want, roll out white fondant and cut out tiny Pisces symbols or stars to place on top. These little touches make the cake feel personalized and celestial.
- Chill before serving:
- Refrigerate the cake for at least 30 minutes so the frosting sets and the cake becomes easier to slice cleanly. This also gives the glitter time to settle beautifully into the frosting.
 Save
Save There's something about watching someone's eyes light up when they see a cake you made that tastes even better than it looks. That's the real reason I keep making cakes like this one, even when the decorating feels fiddly and time-consuming.
Why Room Temperature Matters More Than You Think
The first time I made this cake in winter, I grabbed cold butter and eggs straight from the fridge because I was in a rush, and the batter looked separated and greasy the whole time I was mixing. The finished cake turned out dense and didn't rise the way it should have, and I spent way too long wondering what went wrong. Now I set ingredients out at least an hour before I start, and the difference is honestly night and day—the batter looks creamy and smooth, and the cake comes out tender and light.
The Glitter Game Is Easier Than You Think
People assume that edible glitter requires some kind of special technique, but honestly, it's just about sprinkling it on while the frosting is still slightly tacky. I used to worry about placement and precision, but then I realized that slight imperfection is what makes it look organic and shimmery rather than stiff. The glitter catches light differently depending on the angle, so uneven coverage actually looks more celestial and less artificial.
Storage and Serving Tips
This cake keeps well in the refrigerator for up to three days if you cover it loosely with plastic wrap, and it actually tastes better the next day after the flavors have settled together. If you're bringing it to a party, keep it chilled until just before serving so the frosting stays neat and the glitter doesn't shift around. You can also bake the layers a day ahead and frost them the morning of your event, which makes the whole process way less stressful.
- Remove the cake from the refrigerator 15 minutes before serving so the vanilla flavor comes through more clearly.
- Use a hot, damp knife to slice cleanly between layers, wiping the blade after each cut to keep frosting from dragging.
- Leftover unfrosted cake layers can be wrapped tightly and frozen for up to a month, so don't hesitate to bake extra pans if you're experimenting with the design.
 Save
Save Making this cake feels like bringing a piece of the cosmos into someone's celebration, and there's something deeply satisfying about that. Bake it, watch it shine, and enjoy the moment when everyone stops to admire it before they taste just how good it is.
Recipe Guide
- → What ingredients create the galaxy effect?
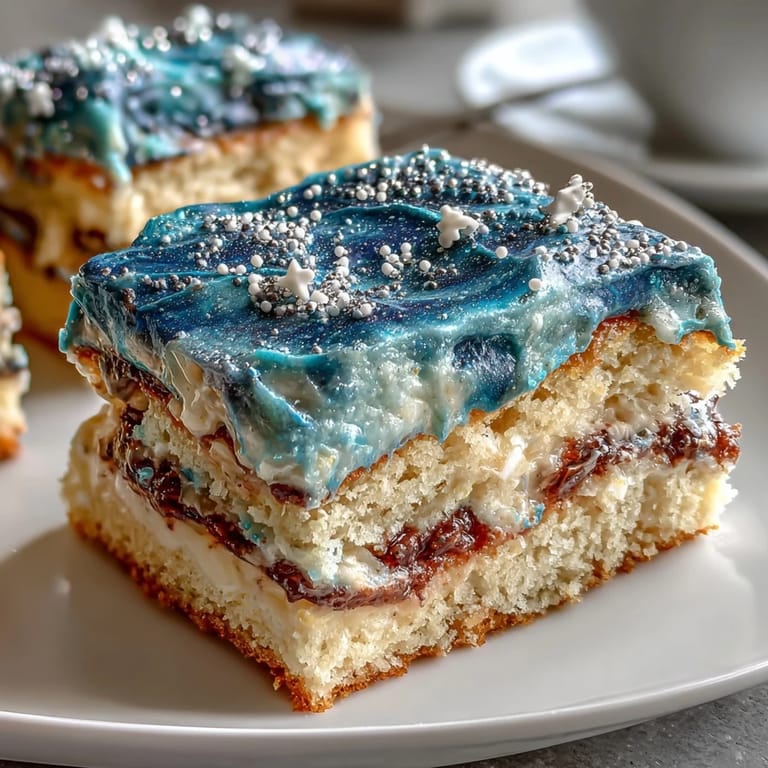
Various gel food colorings in navy blue, purple, teal, and black are swirled into the buttercream to craft the galaxy appearance.
- → Can the cake be made gluten-free?
Yes, you can substitute all-purpose flour with gluten-free flour for a gluten-sensitive variation.
- → How is the edible glitter applied?
The glitter is sprinkled generously over the assembled cake to add sparkle and a shimmering finish.
- → What is the best way to achieve moist vanilla sponge?
Beating butter and sugar until fluffy, alternating flour and milk carefully, and baking to just the right time helps keep the sponge moist.
- → Are there decorative options for this cake?
Optional white fondant elements like Pisces symbols or silver star sprinkles can be added for extra decoration.
- → How long should the cake chill before serving?
Chill the finished cake for about 30 minutes to set the design and firm the buttercream for clean slicing.